July 6, 2002
 All
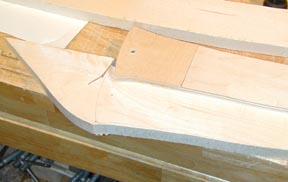
this bright white maple really makes it hard to photograph. I said at the
beginning of this series that I had found it difficult to final-shape the curved
parts due to the toughness of the maple wood being used. I decided to smooth out
the bandsaw curves by making a template and using a pattern-following router
bit. This is a bit similar to a laminate-trimming bit, having straight cutting
flutes and a ball-bearing the same diameter as the cutter. you create a template
out of some thin, relatively hard material (I used the same plywood I used for
the soundboard), fasten it to the workpiece, which has been cut down to close to
the final shape, and run the piece against the router bit, with the bearing
riding along against the template while the cutters eat the excess wood. In this
photo, you see the end of the pillar template. The pillar piece underneath it
still needs to have the end trimmed off.
All
this bright white maple really makes it hard to photograph. I said at the
beginning of this series that I had found it difficult to final-shape the curved
parts due to the toughness of the maple wood being used. I decided to smooth out
the bandsaw curves by making a template and using a pattern-following router
bit. This is a bit similar to a laminate-trimming bit, having straight cutting
flutes and a ball-bearing the same diameter as the cutter. you create a template
out of some thin, relatively hard material (I used the same plywood I used for
the soundboard), fasten it to the workpiece, which has been cut down to close to
the final shape, and run the piece against the router bit, with the bearing
riding along against the template while the cutters eat the excess wood. In this
photo, you see the end of the pillar template. The pillar piece underneath it
still needs to have the end trimmed off.
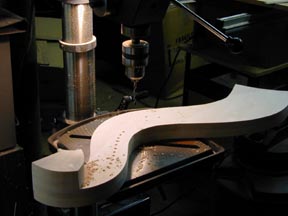
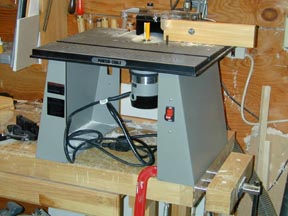 This
works best with a large surface to keep the workpiece flat and oriented
perpendicular to the cutting edges of the bit. This is a small router table made
to fit the Porter-Cable router that I have.
This
works best with a large surface to keep the workpiece flat and oriented
perpendicular to the cutting edges of the bit. This is a small router table made
to fit the Porter-Cable router that I have.
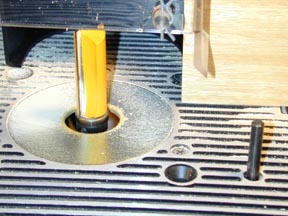 I
told you at the start that the hand-tool focus of the guitarmaking project was
not going to carry through to this project. Here is a closeup of the bit. It's a
two-inch bit known as a door-trimming bit. This size allows me to process the
neck or pillar after gluing up, when they are a full 1-1/2 inches thick.
I
told you at the start that the hand-tool focus of the guitarmaking project was
not going to carry through to this project. Here is a closeup of the bit. It's a
two-inch bit known as a door-trimming bit. This size allows me to process the
neck or pillar after gluing up, when they are a full 1-1/2 inches thick.
The pin sticking up at the right is used as a pivot to bring the work slowly
in contact with the blade. I was able to use this with the pillar, but the neck
was too curvy for it to be any use.
All in all, it was a tense operation, but it worked out very well. There was
a fair amount of burning against the bit that had to be sanded out, but the
overall result was a smooth shape without too much cussin' and spittin'.
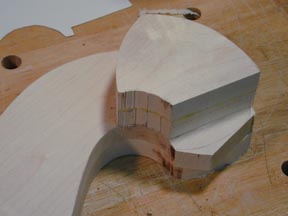 Because
the strings all pull on one side of the neck, there is a strong tendency for the
neck to tip over toward the soundbox. At the point where the neck rests on the
top of the soundbox, a built-up "shoulder" is added to the end of the
neck to counter this tipping. Here, on the main part of the neck, you can
see the smooth result of the router operation, and also some of the burning. The
routing is done before the shoulder is added on, because the shoulder makes the
thickness greater than the cutting height of the router bit. This inner curve of
the shoulder will be smoothed out using a sanding drum after it's glued on. The
final shape of the end that rests on top of the soundbox will be cut out also
after the shoulder is on.
Because
the strings all pull on one side of the neck, there is a strong tendency for the
neck to tip over toward the soundbox. At the point where the neck rests on the
top of the soundbox, a built-up "shoulder" is added to the end of the
neck to counter this tipping. Here, on the main part of the neck, you can
see the smooth result of the router operation, and also some of the burning. The
routing is done before the shoulder is added on, because the shoulder makes the
thickness greater than the cutting height of the router bit. This inner curve of
the shoulder will be smoothed out using a sanding drum after it's glued on. The
final shape of the end that rests on top of the soundbox will be cut out also
after the shoulder is on.
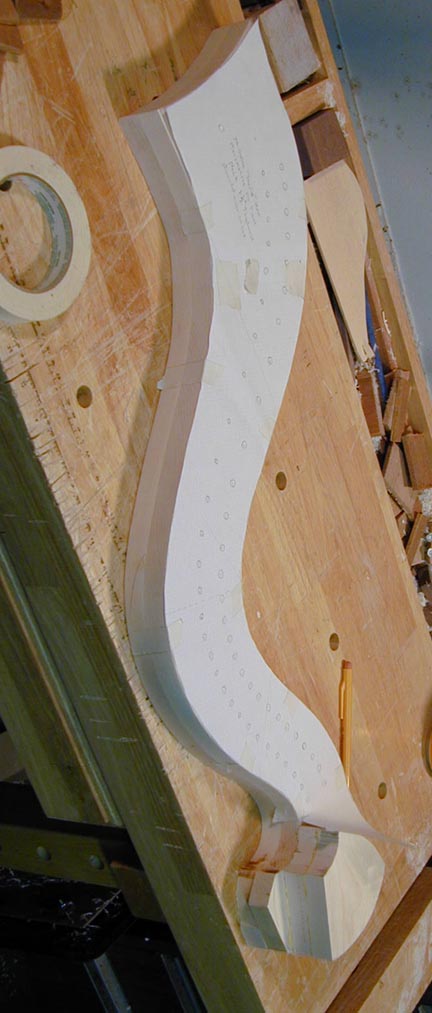 I've
taped down a paper template with the "harmonic curve" -- the layout of
the tuning pins and bridge pins -- on the side of the neck. With the point of a
nail, I'll tap right through the paper to mark the locations of the holes.
I've
taped down a paper template with the "harmonic curve" -- the layout of
the tuning pins and bridge pins -- on the side of the neck. With the point of a
nail, I'll tap right through the paper to mark the locations of the holes.
 The
back, or high, or near, end of the neck (What's the right terminology here?), is
trimmed to its final shape. The flat part sits on top of the soundbox without
any attachment; the tension of the strings holds it in place.
The
back, or high, or near, end of the neck (What's the right terminology here?), is
trimmed to its final shape. The flat part sits on top of the soundbox without
any attachment; the tension of the strings holds it in place.
 Don't
try to drill these holes without a drill press. It's absolutely critical that
there be no slop, especially in the holes for the tuning pins. It's a quick job
to drill the 29 tuning pin holes and 29 bridge pin holes on the drill press.
This plan uses microthreaded "zither pins" instead of the smooth
tapered "harp pins" that go all the way through.
Don't
try to drill these holes without a drill press. It's absolutely critical that
there be no slop, especially in the holes for the tuning pins. It's a quick job
to drill the 29 tuning pin holes and 29 bridge pin holes on the drill press.
This plan uses microthreaded "zither pins" instead of the smooth
tapered "harp pins" that go all the way through.
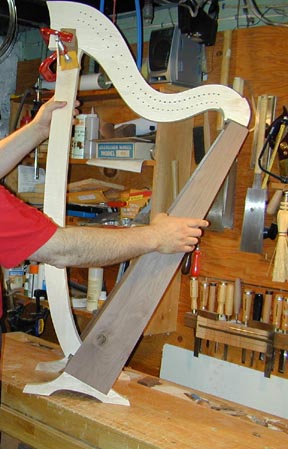 The
neck and pillar are held together by two oval overlays that are here clamped on
for a test-fit. I made the feet while waiting for glue to dry! I made a taller
set of legs for this harp, but I wasn't sure at this point if I'd have time to
do that. I wanted to be able to get the harp finished and strung before deciding
about the legs. I found out, working on the first harp, that the darned thing
won't stand up when the neck and pillar are attached without the feet, and it's
next to impossible to string it if it won't stand up! Also, it's much easier to
fit the neck and pillar if the box will stand up.
The
neck and pillar are held together by two oval overlays that are here clamped on
for a test-fit. I made the feet while waiting for glue to dry! I made a taller
set of legs for this harp, but I wasn't sure at this point if I'd have time to
do that. I wanted to be able to get the harp finished and strung before deciding
about the legs. I found out, working on the first harp, that the darned thing
won't stand up when the neck and pillar are attached without the feet, and it's
next to impossible to string it if it won't stand up! Also, it's much easier to
fit the neck and pillar if the box will stand up.
Time Today: 7 hours. Total so far: 22.5 hours
Previous Next
Harp Pages Home Home
Copyright © 2002 Stephen Miklos