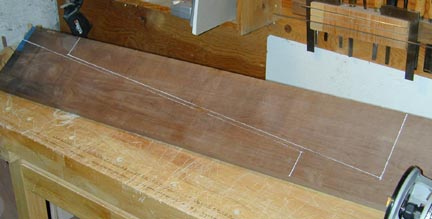
 The walnut side pieces
are marked on this rough board in white chalk pencil. A black pencil mark would
get lost on the dark walnut.
The walnut side pieces
are marked on this rough board in white chalk pencil. A black pencil mark would
get lost on the dark walnut.
I'm building this harp from the Musicmakers' Kits "Studio Harp"
plans, but I'm not using the kit. It's a simple 29-string nylon-strung harp. They say it's their
best-selling kit. If you want to follow this very closely, you might want to buy
the plans from them. I'm not going to give any measurements or anything that
would violate Musicmakers' intellectual property rights. That said, the
construction of this harp is simple, and you should be able to get an idea of
what goes into building a harp from one of their kits -- without the structural parts of the
kit! I'm not so foolish as to try to assemble the hardware and strings
package on my own, though. That, I bought from Musicmakers'.
I'm starting with the "box", the part that includes the soundboard. If you look at the photos of the finished harp, or the plans, you'll see that the two side pieces are tilted and sloped, making the box both narrower and shallower at the top than at the bottom. There's some tricky geometry. It involves cutting some rabbets in the ends of the sides that are tilted at seven degrees, and cutting off the ends at a shallow angle to make the top and bottom flat.
The walnut side pieces
are marked on this rough board in white chalk pencil. A black pencil mark would
get lost on the dark walnut.
I've jointed the edges to have a straight edge to mark from. Because my jointer isn't as wide as this board, I'll cut these pieces out on the bandsaw before face jointing them. (A personal quirk: I hate the table saw. I'd rather make a cut by eye, following a line, on the bandsaw and then clean it up later, than use the table saw. I only use the table saw for things that would be a LOT more trouble to do otherwise.
All the marked measurements are a little generous; after jointing and planing down to 3/4 inch, the true dimensions will be marked and cut.
The final end cut is made at an angle to provide a flat bottom all the way across. The pieces have been face-jointed and run a half-dozen times through the planer to get to the final thickness. Much of the work today had to do with bringing the 4/4 stock down to a smooth 3/4 inch thickness. If you blow a little extra for S2S 3/4 stock, you'd save that work.
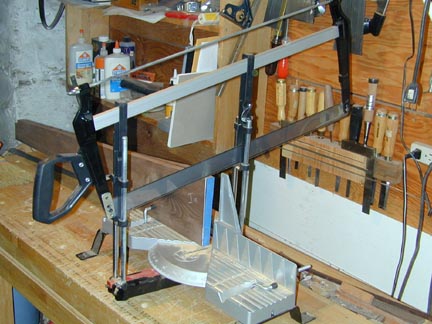
This Nobex miter saw is one of my favorite tools. It sure beats setting up the table saw for a one-off crosscut. Very smooth and accurate. I set the angle to 7 degrees, lock it down and off I go.
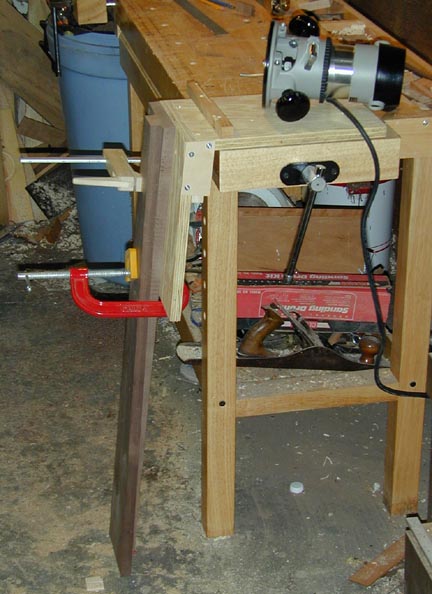
The rabbets on the ends of the sides were a pain to get right with hand tools, and I devised a jig to make it easier and more accurate. Click here for drawings of the jig that might make it a little clearer than the photos below.
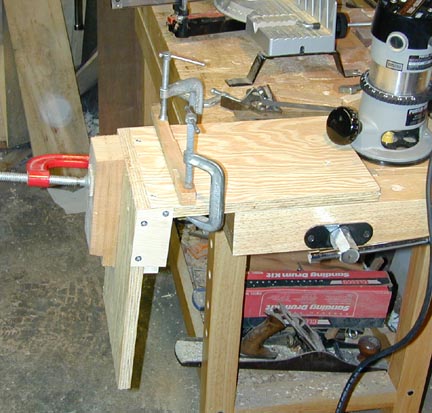
Here's the jig as built, almost complete. The "fence" for the router to ride against is clamped in place for a test cut; if this works as expected the fence will be screwed down.
Two scrap wood pieces are clamped in position for a test cut (at left with the red clamp).
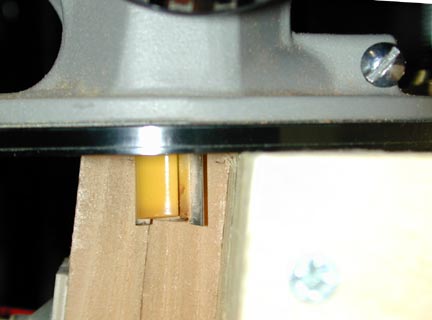 With
the router on top, you can see the angled cut that will result. The total width
of the rabbets in the two pieces is 1 inch, while the router bit is only 3/4.
I'll make a second cut with a 1/4-inch strip against the fence. That will push
the router to the left 1/4 inch and widen the groove it makes into the leftmost
piece.
With
the router on top, you can see the angled cut that will result. The total width
of the rabbets in the two pieces is 1 inch, while the router bit is only 3/4.
I'll make a second cut with a 1/4-inch strip against the fence. That will push
the router to the left 1/4 inch and widen the groove it makes into the leftmost
piece.
The first cut is made in three 1/4 inch passes. The second offset cut is at full depth.
Here's the jig with the side pieces mounted. The wide end of one piece and the narrow end of the other are at the top, about to be cut simultaneously. The boards clear the floor by about an inch!
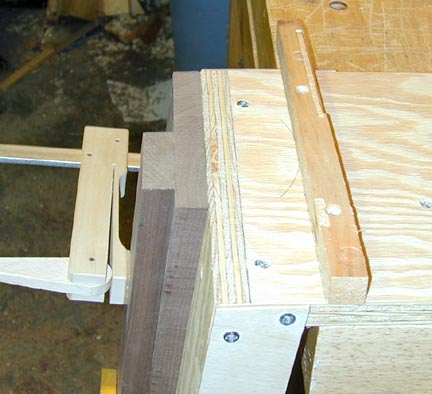
Here's a closer view of the edges to be cut.
After the first three passes. I cut 1/4-inch deep, then 1/2 inch, then 3/4 inch. The wood took it very well.
Next I'll slip a 1/4-inch strip in next to the fence and take another full-depth cut, widening the slot to 1 inch.
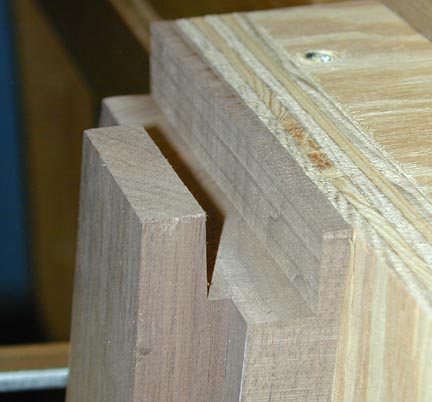
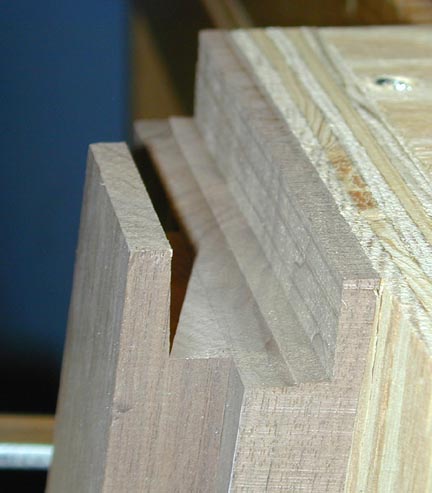 And
here's the final result. The angle isn't much, but it's important that it be
right.
And
here's the final result. The angle isn't much, but it's important that it be
right.
Time so far: 1 hour earlier in the week on the jig. 3-1/2 hours today. Total 4-1/2 hours.
Copyright © 2002 Stephen Miklos